How To Remove Caulk From A Tub Or Shower
Caulk is a versatile material that plays a crucial role in sealing joints and gaps around your tub or shower, preventing water damage and ensuring a clean, polished look. Over time, however, caulk can wear out, discolor, or become moldy, necessitating its removal and replacement. While some DIY enthusiasts may be eager to take on the challenge themselves, it’s essential to recognize when it’s time to call in the professionals when wondering how to remove caulk from a tub or shower.
In this guide, we’ll walk you through the steps of how to remove caulk from a tub or shower, highlighting the nuances of the process and explaining why, in certain situations, it’s best to rely on experts like Oliver for a seamless solution.
Gathering The Necessary Tools
Before you start the caulk removal process, gather the necessary tools and materials. You’ll need a utility knife, a caulk remover solution, a caulk removal tool, a scraper, and a cleaning agent. Make sure to wear protective gear, including gloves and safety glasses, to protect yourself during the process.
- Soften the Caulk: Apply a caulk remover solution to the old caulk and let it sit for the recommended time. This softens the caulk, making it easier to remove without causing damage to the surfaces beneath.
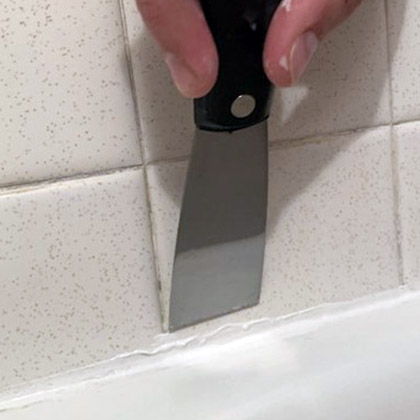
- Cutting and Scraping: Use a utility knife to cut through the caulk along the edges, creating a separation between the caulk and the surfaces it seals. Be careful not to damage the surrounding tiles or the bathtub. Once you’ve made the initial cut, use a caulk removal tool or scraper to carefully lift and peel away the caulk.
- Cleaning the Area: After successfully removing the old caulk, thoroughly clean the area to eliminate any residue. Use a cleaning agent to ensure that the surfaces are free from any remaining caulk, dirt, or debris.
Know When To Seek Professional Help
While the steps outlined above might make the process seem straightforward, there are many instances when caulk removal becomes a complex task. If you encounter challenges such as stubborn caulk, underlying issues like water damage, or you lack the time or expertise, it’s smart to consider professional assistance.
Why To Choose Oliver For The Job
- Expertise: Oliver’s team of professionals is well-versed in tackling complex home improvement tasks, including caulk removal and replacement. Their extensive experience ensures a meticulous and efficient job.
- Time-Saving: DIY projects can be time-consuming, especially when unexpected challenges arise. Oliver’s professionals can complete the task quickly and with minimal disruption to your routine.
- Quality Results: Professional caulk removal ensures a high-quality finish, leaving your tub or shower looking brand new. Oliver’s attention to detail guarantees a seamless and long-lasting result.
The Professionals At Oliver Are Here To Help
Following the steps for how to remove caulk from a tub or shower can be a rewarding DIY project, but it’s crucial to recognize when to seek professional help. Oliver offers a reliable and efficient solution, ensuring that your bathroom remains in pristine condition without the hassle of tackling the task yourself. Contact us online today for expert assistance and enjoy a beautifully sealed and visually appealing tub or shower space.