How To Clean The Clogged Aerator On A Faucet
Is the flow of water from your faucet decreasing? Or coming in bursts or spurts? Before assuming that your home has lost water pressure, check the faucet aerator. These screens fitted at the end of faucets gradually clog up with mineral debris from hard water. Following these steps for how to clean the clogged aerator on a faucet will restore water flow.
Why Do Faucets Have Aerators?
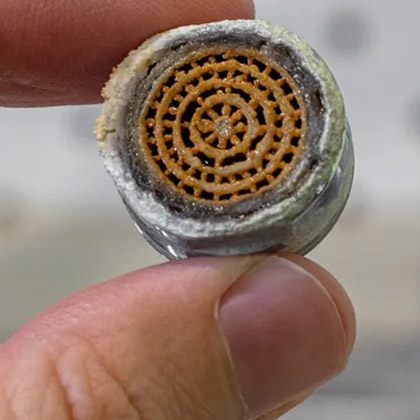
The screen inside the aerator that screws onto the end of the faucet introduces air to the flowing water. The screen diffuses the water with air so that the faucet produces a steady stream. Without an aerator, water runs out of the faucet like the end of the hose. The difference is quite noticeable. The stream of water feels weak and won’t froth up liquid dish soap squirted into the sink.
Tools Needed
- Pliers (Preferably channel lock pliers)
- A Small bowl
- A Screwdriver
- Old toothbrush
- Toothpick or needle
Step by Step Directions:
- Wrap masking tape around the gripper jaws of your pliers. This prevents the tool from scratching the external cylinder holding the aerator.
- Place the pliers around the cylinder that extends down from the end of the faucet.
- Turn the cylinder to the left (counterclockwise).
- Once the cylinder is loose, you can unscrew it the rest of the way with your hand.
- Run the faucet for a minute to clear out debris that may be stuck inside.
- Inspect the inside of the cylinder. You should see visible mineral buildup.
- Scrap off thick scale if necessary so that you can disassemble the aerator.
- If it is too crusty to work with, pour some vinegar into a bowl and drop the aerator in the liquid. The vinegar will loosen the minerals. You can also use a calcium, lime, rust (CLR) remover product.
- Let the aerator soak for an hour. Minerals should be sufficiently loose to take apart the aerator.
- Scrape out loose material with the end of a screwdriver.
- Inside the cylinder, you’ll see a rubber ring, mixer disc, and screen. As you take out the parts, keep track of their order. Take a picture if you want to refer to it later during reassembly.
- With an old toothbrush, scrub the mineral scale off the parts.
- Use a toothpick or needle to push minerals out of the screen.
- If deposits are stubborn, put the parts back in the vinegar to soak.
- Once the parts are free of minerals, reassemble the aerator.
- You can screw the aerator back onto the faucet with your hand. It only needs to be hand-tight.
- Turn on the faucet and confirm that the water flow has been restored.
Expert Plumbers At Your Service
Cleaning your aerator only addresses one problem with a faucet. If you have persistent dripping, then you should contact Oliver about fixture replacement. If you have concerns about your water quality, we also have experts who can test and treat your water. Contact us with your water quality questions today.