How To Flush A Water Heater
Minerals in household water collect as sediment in a water heater. In a gas tank water heater, the sediment interferes with the distribution of heat. Hot spots that can damage the tank itself could develop. In an electric water heater, the sediment will eventually kill the lower heating element. Either way, you should know how to flush a water heater so you can maximize its life.
Step by Step Directions:
- Turn off the water heater’s gas or electricity.
- Run a hot water tap on full blast for 10 minutes.
- Above the tank, turn off the cold water valve to cut off the supply of new water.
- Screw a garden hose to the drain outlet at the bottom of the tank.
- Route the hose to a floor drain or bucket.
- Place a colander between the hose and drain to stop sediment from clogging the drain.
- Open a hot water faucet in the house.
- Open the tank drain valve.
- Once the sediment clogs the drain valve, shut off the faucet.
- Close the drain valve.
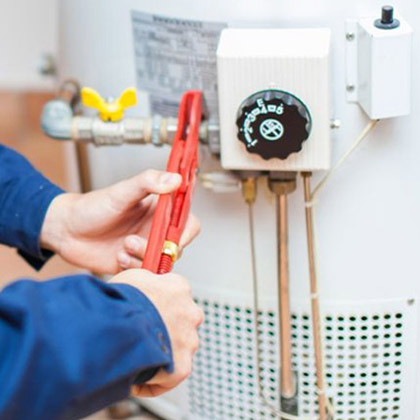
- Use a wrench to remove the temperature pressure release (TPR) valve on the upper side of the tank.
- Glue together a 1-1/2-inch PVC x 3/4-inch FIP adapter onto a female PVC trap adapter. This builds an adapter for connecting the shop vacuum to the water heater.
- Connect the adapter to the vacuum hose.
- Insert the adapter into the TPR valve opening.
- Turn on the vacuum to apply suction inside the tank. This reduces water flow when you remove the old drain valve.
- Drain valve replacement is necessary because the old one will have sediment stuck in it now. It will never shut properly and leak as a result.
- With a wrench, unscrew the plastic nut securing the valve.
- Build a new valve with a 3/4-inch, full-port brass valve with threaded ends, 3-inch x 3/4-inch galvanized nipple, and 3/4-inch hose adapter.
- With the valve in the closed position, install it on the tank.
- Connect the garden hose to the new valve.
- Keep the other end of the hose at the floor drain with a colander.
- Take away the vacuum hose.
- Open and shut the cold water supply line above the tank to send bursts of water into the tank and dislodge material.
- After bursting, let the water run until it comes out clear.
- Add a barbed fitting to your shop vacuum adapter and connect a 1/2-inch I.D. vinyl tube.
- Insert the tube into the full-port valve and suck out the last of the sediment.
- Close the valve.
- Put the TPR valve back on the side.
- Refill the water heater.
- Restore electricity or gas to the water heater.
- For a gas water heater, you’ll need to relight the pilot light.
Tools Needed
- Screwdrivers
- Adjustable wrench
- Bucket
- Colander
- Garden hose
- Plumber’s tape
- Rags
- Shop vacuum
- Slip joint pliers
Stay Clean And Dry With Help From Oliver
To be honest, how to flush a water heater is a wet and messy job. Depending on how hard your water is, you may need to do this maintenance flush every year. A licensed plumber from Oliver can take care of this chore for you. Our quick service represents a good value and protects your water heater from failing before its time. Ask us for a water heater service estimate today.