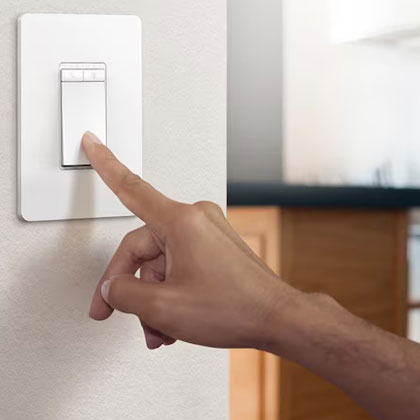
How To Install A Dimmer Switch
Installing a dimmer switch can instantly upgrade the comfort and style of your home. Dimming lights can save energy, extend bulb life, and create the perfect atmosphere. While learning how to install a dimmer switch may seem like a manageable DIY project, working with electricity always carries risks. Before you begin, it’s important to know the proper tools, steps, and when to call a professional like Oliver for safe, reliable service.
Step-by-Step Guide To Installing A Dimmer Switch
Step 1: Turn Off The Power
Go to your electrical panel and switch off the breaker controlling the light you want to modify. Double-check by using a voltage tester at the switch to confirm the power is off before touching any wires.
Step 2: Remove The Old Switch
Unscrew the wall plate and mounting screws. Gently pull the switch out of the electrical box, keeping track of how the wires are connected.
Step 3: Disconnect The Wires
Loosen the terminal screws and disconnect the wires from the old switch. Take note of which wire is the ground, which is hot, and which is neutral (if present).
Step 4: Connect The Dimmer Switch
Attach the wires to the corresponding terminals on your new dimmer switch. Typically, the black wire connects to the hot (live) terminal, the ground wire connects to the green terminal, and the other wires connect as instructed by the manufacturer. Secure all connections with wire nuts and, if needed, wrap with electrical tape for extra safety.
Step 5: Secure The Dimmer And Reattach The Plate
Carefully tuck the wires back into the box, screw the dimmer into place, and reattach the wall plate.
Step 6: Restore Power And Test
Turn the breaker back on and test your dimmer switch. If everything works properly, your installation is complete.
Why Call Oliver Instead Of DIY?
Even though dimmer switch installation looks simple on paper, electrical work often comes with hidden complications. Incorrect wiring can lead to serious safety risks, including electrical shocks, tripped breakers, or even fire hazards. That’s why it’s always smarter to trust the licensed electricians at Oliver. Since 1971, we’ve provided homeowners across PA, NJ, and DE with reliable electrical services that prioritize safety, quality, and peace of mind.
Tools Needed
- Screwdriver (flathead and Phillips)
- Voltage tester
- Wire stripper
- Electrical tape
- Wire nuts
- The new dimmer switch
Call Oliver For Professional Electrical Services
If you’re considering learning how to install a dimmer switch yourself, don’t take chances with your safety. Working with your home’s electrical system can be hazardous if you don’t have the proper training or experience. Reach out to our trusted team at Oliver today and enjoy the confidence that comes with professional service. Contact us online for a consultation with Oliver’s experienced lighting specialists.